|
A hatra ballista has inward swinging arms that allows for 90 degree's of rotation during the throw. Our model has 3 foot long
arms. For our first year, these arms were made particularly strong.
 My Dad had made the arms as one of the first items when we decided to do this project together.
They are made of three layers of ash, with two layers of thin cherry between them. The alternating wood layers will
make these beams which are 2 inches thick at the tip, and 3 inches thick at the base super-strong and resilient.
My Dad had made the arms as one of the first items when we decided to do this project together.
They are made of three layers of ash, with two layers of thin cherry between them. The alternating wood layers will
make these beams which are 2 inches thick at the tip, and 3 inches thick at the base super-strong and resilient.
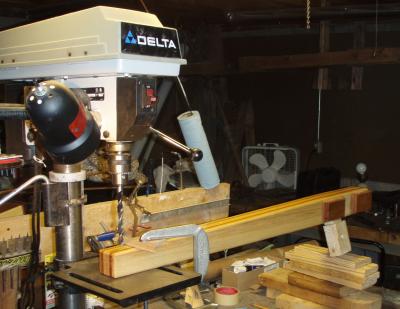
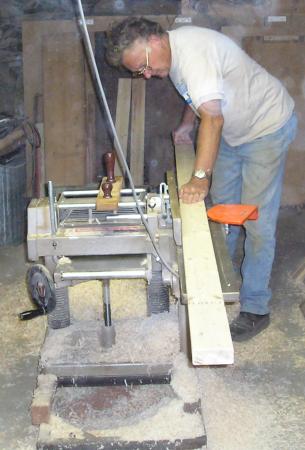
I then needed to drive some sort
of pin through the tips of the arms to keep the bowline from slipping up and down the arms. Using the tilt feature of the drill press
table, and a a Dr. Seuss style stack of wood on the other, I managed to drill a square hole in an angled piece of wood.
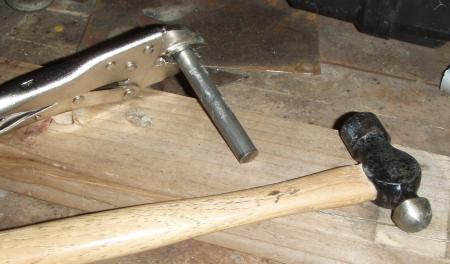 The holes were drilled 1/2 inch to take the 1/2 in rod. Since Ash drills very nicely, I then had to beat imperfections into
the rod to get friction to hold them into the holes I drilled. I also used a file to put notches in the rod so a light layer
of wood glue would have something to hang on to.
The holes were drilled 1/2 inch to take the 1/2 in rod. Since Ash drills very nicely, I then had to beat imperfections into
the rod to get friction to hold them into the holes I drilled. I also used a file to put notches in the rod so a light layer
of wood glue would have something to hang on to.
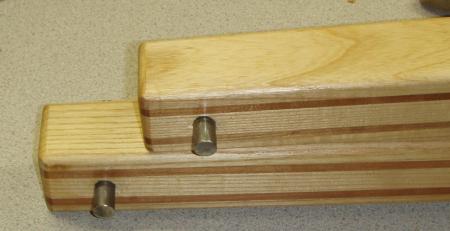 Here are the arm-tips with the installed pins. The purpose of the pins is to prevent the bowline from slipping down the length
of the arms. The bowline itself will wrap around the arm.
On Mr. Ballista the bowline wraps around the pins, so this is a different strategy.
Here are the arm-tips with the installed pins. The purpose of the pins is to prevent the bowline from slipping down the length
of the arms. The bowline itself will wrap around the arm.
On Mr. Ballista the bowline wraps around the pins, so this is a different strategy.
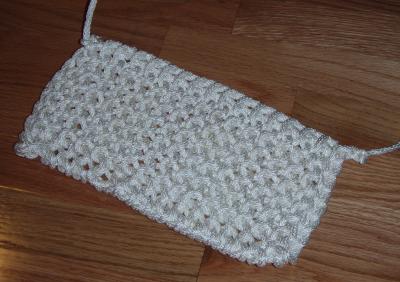 Once again, Amy comes through and knits up a nice little pouch for a 2lb pumpkin.
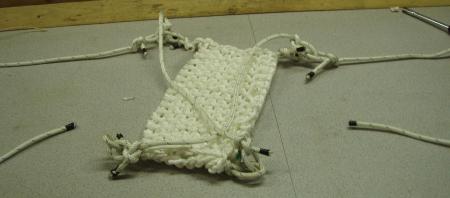 Using the same technique as Mr. B, create several segments and use loops to connect them together. This is the first pass
on the bowline, and it turned out to be a little bit short, and the leads (the X in the middle) to the trigger are a little bit long.
Using the same technique as Mr. B, create several segments and use loops to connect them together. This is the first pass
on the bowline, and it turned out to be a little bit short, and the leads (the X in the middle) to the trigger are a little bit long.
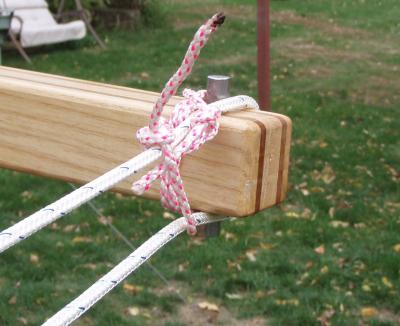 The bowline just loops over the arms, and the pins prevent the bowline from being dragged backwards over the arm. The pink
line uses a strangle-knot over the arm behind the pin, and a quick loop just keeps the bowline from being flung into the field.
The bowline just loops over the arms, and the pins prevent the bowline from being dragged backwards over the arm. The pink
line uses a strangle-knot over the arm behind the pin, and a quick loop just keeps the bowline from being flung into the field.
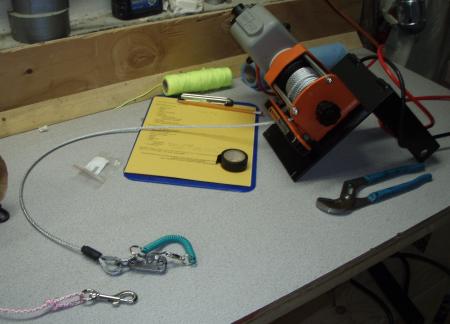 I finally get to use the little seacatch on a machine it was designed for. Here you can see the winch-mount bracket, winch, and the
seacatch attached directly to the winch cable. A pink-polyester lanyard with a quick-clip on it will be used to attach to the
seacatch after the machine has been pulled back.
I finally get to use the little seacatch on a machine it was designed for. Here you can see the winch-mount bracket, winch, and the
seacatch attached directly to the winch cable. A pink-polyester lanyard with a quick-clip on it will be used to attach to the
seacatch after the machine has been pulled back.
 At the 2007 Punkin Chunk, the winch bottomed out, and couldn't pull anymore. To improve the pulling power, we added a pulley into the winch cable.
The winch cable then wrapped around back to the winch platform. A hole was eventually drilled into the winch mounting plate so that
a shackle could hold the other end of the cable.
At the 2007 Punkin Chunk, the winch bottomed out, and couldn't pull anymore. To improve the pulling power, we added a pulley into the winch cable.
The winch cable then wrapped around back to the winch platform. A hole was eventually drilled into the winch mounting plate so that
a shackle could hold the other end of the cable.
|
Additional Pages for Hatra Jr
|
|
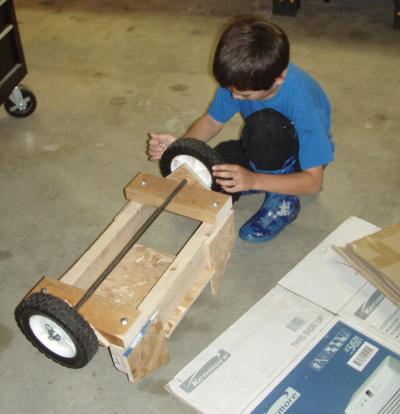
Hatra Ballista Jr
|
 After building and testing Baby Hatra Ballista, it was clear this design was
worth pursuing. Eric decided we needed a mid-sized model which we could then
enter into the World Championship Punkin Chunk in the 10 and under category.
After building and testing Baby Hatra Ballista, it was clear this design was
worth pursuing. Eric decided we needed a mid-sized model which we could then
enter into the World Championship Punkin Chunk in the 10 and under category.
|
|
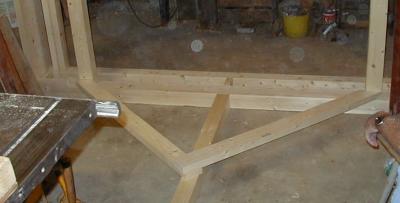
Hatra Ballista Jr: Spring Frame
|
 A Hatra Ballista Spring frame is a bit different from a Straight or V spring ballista.
|
|
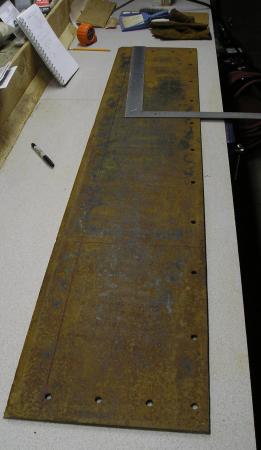
Hatra Ballista Jr: Scapus Frame
|
 There wasn't much to go on with historical references for the Hatra Ballista, just a meta spring frame
covering, and an artist's rendition in the book
Greek and Roman Artillery 399 BC-AD 363. As such, I opted to go with a mix of
what we did with Mista Ballista in metal, or Baby Hatra Ballista.
There wasn't much to go on with historical references for the Hatra Ballista, just a meta spring frame
covering, and an artist's rendition in the book
Greek and Roman Artillery 399 BC-AD 363. As such, I opted to go with a mix of
what we did with Mista Ballista in metal, or Baby Hatra Ballista.
|
|
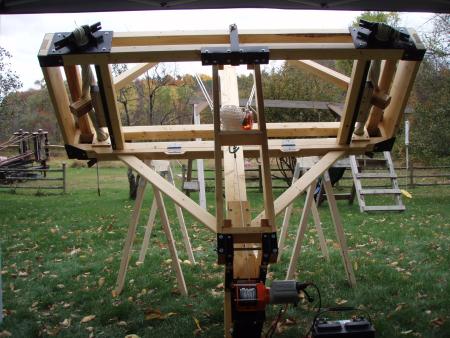
Hatra Ballista Jr: Torsion
|
 The load bearing parts for Hatra Ballista Jr are very similar to what I made for
Onager Jr, though I've made several changes to help assist in the operation
and use of the machine.
The load bearing parts for Hatra Ballista Jr are very similar to what I made for
Onager Jr, though I've made several changes to help assist in the operation
and use of the machine.
|
|
Hatra Ballista Jr: Arms and Bowline
|
A hatra ballista has inward swinging arms that allows for 90 degree's of rotation during the throw. Our model has 3 foot long
arms. For our first year, these arms were made particularly strong.
|
|
Hatra Ballista Jr: Deployment
|
 Hatra Jr is easy to deploy. That's one of the reasons it took so much extra time to build the thing.
|
|
Hatra Ballista Jr: Shooting
|
 Various pictures and stories of launching Hatra Ballista Jr.
|
| 