|
The UTM has four bundles. Two short bundles, and 2 long bundles. Each bundle was designed to have similar equipment, but there are two sets, each a different length.
Two short bundles, at 12" long, are the first we finished building. The longer bundles will help test variance between bundle length, and what the power curves for the bundle are.
We decided to try yet another technique for making modiolii. This time we decide to cut them out of some sheet steel, and then bend that into a nice shape.
 First, I designed a template on the computer, and printed it onto card-stock. I traced it onto the sheet steel which was then cut out using a combination of a saws-all, and a jig saw with a special metal cutting blade.
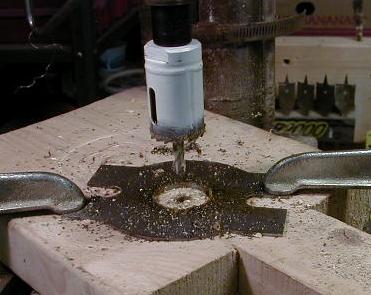 Once the outline was cut, I transferred center holes through the card stock template onto the sheet metal, and then cut out the circular parts, such as the center hole, and epizygis holding notches on the ends.
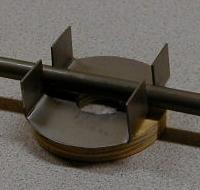 A quick trip in the bending machine, and the tabs are bent up. The 1/2" diameter steel rod to be used as the epizygis fits in nicely, and is held only slightly over the base metal of the modiolus.
The whole thing sits on a wooden washer made from plywood, and cut using two different sized hole saws. The wooden washer serves to add friction, so no pins are needed to hold the twist in the machine.
These modiolii in summary:
I like these modiolus more than previous versions. The tabs hold the ballista version of the machine up in a stable way.
Things to look out for. These modiolus bend slightly when under tension. If the bend is made at the bottom of the epizygis holding U, then this is not a problem.
Also, round down the corners of your modiolus if you use this template. The sharp corners can be painful if you grab them on a finished machine.
UTM Has two sets of bundles at two different lengths. They were both built from the same templates.
 The core of the bundles was made out of poplar. I wanted to build the UTM out of a sturdier wood than the pine used in previous machines, and also in a wood that is easy to work with. As it turns out, Poplar is also much cheaper than other woods including pine.
 The poplar didn't come in a thickness I needed, so I laminated two sheets together. I then cut up these sheets into the desired squares for the scutula design.
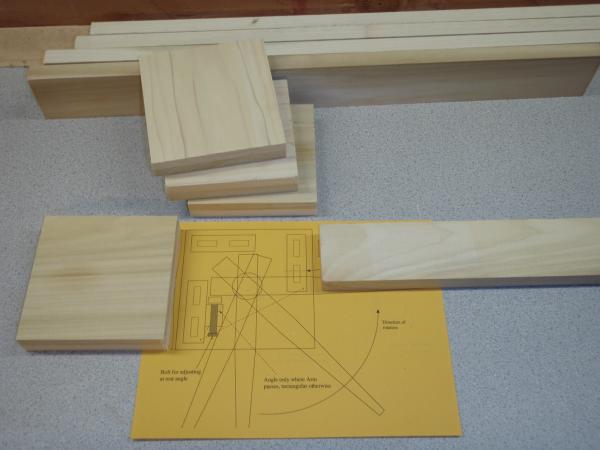 I then printed out the scutula pattern at 1 to 1 scale with the wood I was working with. As you can see in this diagram, the UTM bundle should enable a bit more than 90 degrees of twist for the arm. In practice, I left too little space inside the bundle to allow for bundle warping. I recommend leaving a bit more space to allow the bundle to move around.
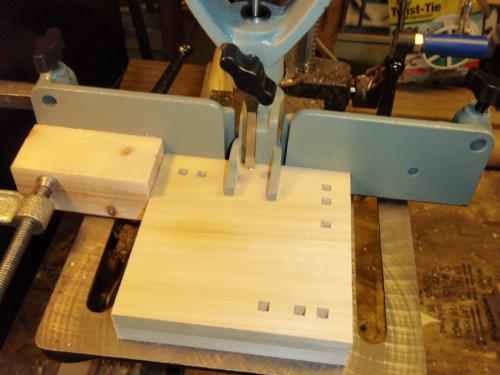 Using a square hole cutter, I then cut out the mortises into the scutula squares. I had to go back and clean up these holes to get a tight fit.
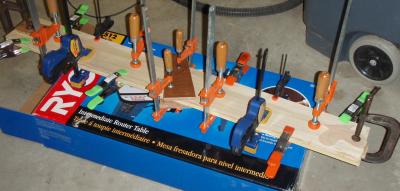
 The stanchions were all cut to length, for either the 12 or 18 inch bundles. I used a router and router table to then cut the tenons in a precise way. Clamping all the stanchions together made it easy to make them all identical.
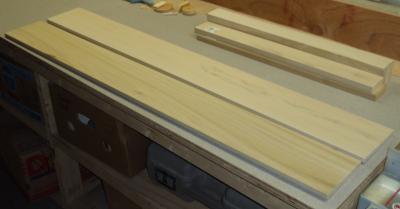
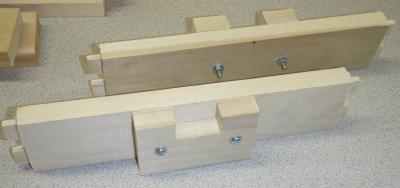
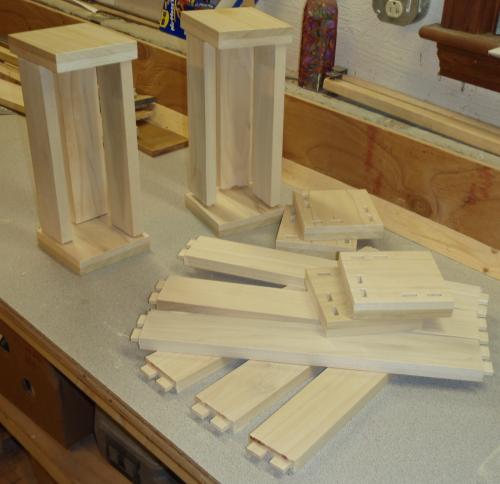 In this image you can see two completed bundle frames, and all the parts needed for the taller bundle. After the basic routing and cutting of mortise and tenon, cleanup work started. The tenons needed to be lightly sanded, and the mortise holes cleaned up.
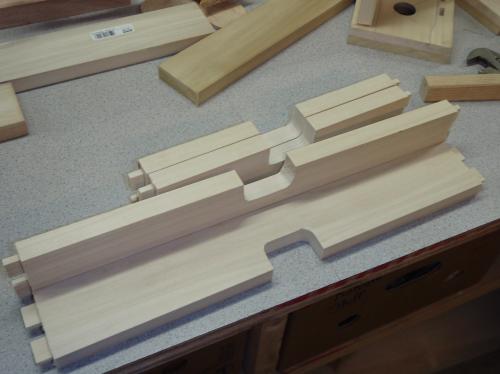 Notches had to be cut out of the outer stanchion. The notches provide the space needed by the arms to swing forward.
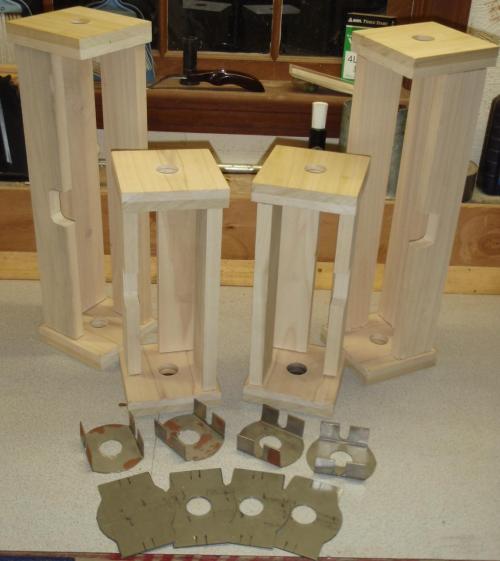 Here you can see the 4 completed and assembled bundles, plus 4 completed modiolii, and 4 temlate modiolii.
 Next, arm stops were added to the inner stanchion. The arm-stop in a traditional machine strikes the inner stanchion directly. For the UTM, I wanted to be able to vary the at-rest angle of the arm from by controlling where the butt of the arm strikes the inner stanchion. By bolting on an arm stop, I can adjust the at rest angle by replacing this pieces of wood with a different one. Even flipping this single piece around provides two possible at rest angles.
|
Winding the short bundles
|
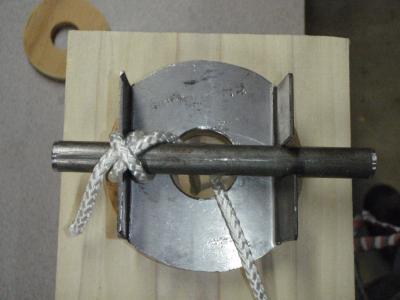 Unlike previous windings, on the UTM I used a knot over the epyzigis instead of an in-bundle bowline. The bowline weakens the rope, increasing the chance of failure. By wraping the rope over the epizygis, the strength is maintained, but there is an increased chance of slipping. For this techinique, I've had no slipping yet.
Unfortunately, none of the winding images came out well.
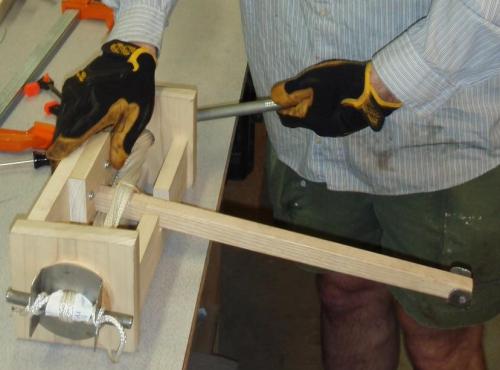 After winding, roger uses a pipe over the epyzigis to tighten up the bundle. Here, and arm from an old compounded ballasta was used.
This image makes it clear that it is possible to have the arm swing past perpendicular. This will allow us to test onager configurations where the arms swings forward in that way.
After winding, roger uses a pipe over the epyzigis to tighten up the bundle. Here, and arm from an old compounded ballasta was used.
This image makes it clear that it is possible to have the arm swing past perpendicular. This will allow us to test onager configurations where the arms swings forward in that way.
|
Additional Pages for UTM
|
|
UTM: Universal Torsion Machine
|
 The UTM, or Universal Torsion Machine, is a small scale torsion engine designed to answer the oft asked question, "What is the best Torsion Engine configuration?"
|
|
Universal Torsion Machine: Torsion Bundles
|
The UTM has four bundles. Two short bundles, and 2 long bundles. Each bundle was designed to have similar equipment, but there are two sets, each a different length.
|
|
Universal Torsion Machine: VSpring Configuration
|
 The V-Spring configuration for UTM models the classic Greek ballista. It was also set up to be able to model Mista Ballista's V spring configuration so we might determine ideal arm at-rest angle and arm length.
|
|
Universal Torsion Machine: Results
|
Here are the hard numbers from various UTM runs we do.
|
|
Universal Torsion Machine: Software
|
The UTM design was originally inspired by a MATLAB program I wrote. This program is able to simulate the geometric efficiency of different configurations. Since it doesn't model the actual effectiveness by measuring load on the bundle, we felt the need to create a physical model that could have the same flexibility.
|
| 